Tag: arduino

Arduino and the SD Cards

As I delved deeper into my Arduino journey, I soon recognized the importance of collecting and storing data. This realization came after I had gained proficiency in working with various components, including piezo buzzers, vibrant LEDs, precise digital temperature and humidity sensors, real-time clocks (RTC), and the 16×2 LCD display. With these tools at my disposal, I was able to embark on a fascinating project – a clock that not only kept time but also displayed real-time humidity and temperature readings. This project marked a significant milestone in my Arduino learning adventure, showcasing the practical applications of my newfound skills.

Read more: Arduino and the SD Cards

List of Materials

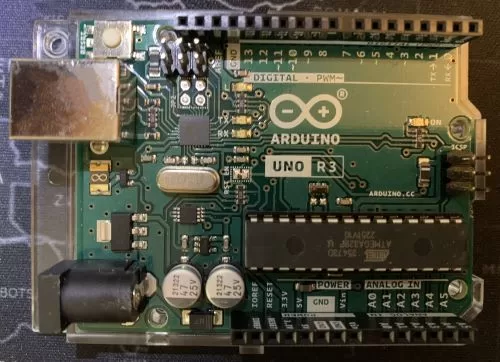
  • Arduino Uno R3
  • Lexar 32GB Micro SD Card, microSDHC UHS-I Flash Memory Card

References

Notes
Arduino and the RTC (Real Time Clock)

After learning how to use a 16 x 2 LCD Display with Arduino to show data, I was inspired to create a digital clock using use a 16 x 2 LCD Display to display date and time. However, I discovered that Arduino lacks a built-in clock. To address this, I learned that an RTC (Real-Time Clock) is necessary to work with date and time information.

Read more: Arduino and the RTC (Real Time Clock)

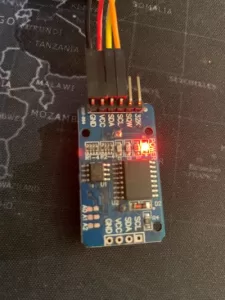
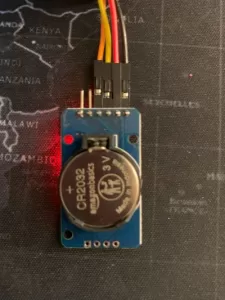
On this project, I used a DS3231 Real Time Clock Module.

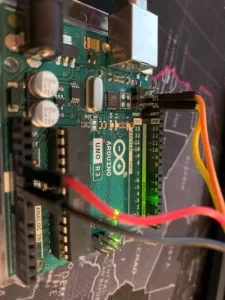
On the DS3231 Real Time Clock Module, I connected the red cable to VCC, then connected the black cable to the ground pin. I connected the orange cable to SCL pin, then connected the yellow cable to SDA pin.

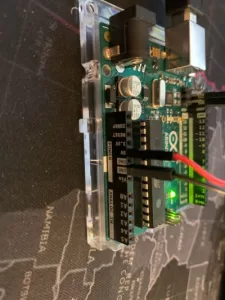
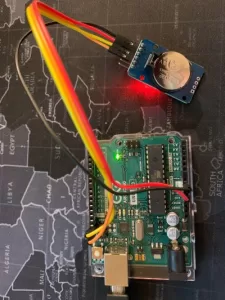
This is how it looks how I connected the DS3231 Real Time Clock Module to Arduino Uno.

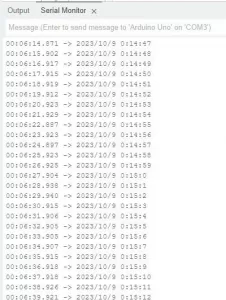
This is what the serial monitor will look like after the sketch is uploaded to the Arduino Uno.

Connect your Arduino to your computer and upload the sketch. Below is the sketch to upload to your Arduino.

#include <Wire.h>
#include <DS3231.h>

DS3231 Clock;
RTClib RTC;

void setup() {
  // put your setup code here, to run once:
  Wire.begin();
  Serial.begin(9600);

  Clock.setYear(23);
  Clock.setMonth(10);
  Clock.setDate(9);
  Clock.setDoW(1);
  Clock.setHour(0);
  Clock.setMinute(10);
  Clock.setSecond(50);
  Clock.setClockMode(0);
  }

void loop() {
  // put your main code here, to run repeatedly:
  DateTime Time = RTC.now();

  Serial.print(Time.year(), DEC);
  Serial.print("/");
  Serial.print(Time.month(), DEC);
  Serial.print("/");
  Serial.print(Time.day(), DEC);
  Serial.print(" ");
  Serial.print(Time.hour(), DEC);
  Serial.print(":");
  Serial.print(Time.minute(), DEC);
  Serial.print(":");
  Serial.print(Time.second(), DEC);
  Serial.println();

  delay(1000);
}

List of Materials

  • Arduino Uno R3
  • DS3231 AT24C32 Real Time Clock Module
  • Male-to-female breadboard jumper ribbon cables

References

Notes

Arduino

Learning Arduino – 1 of many

In 2010, I got myself an Arduino Duemilanove, here is the link to my post https://nhymbe.net/arduino/. I got interested in learning about it and wanted to see what can I build with it. I know I have a decent knowledge of how to code in C/C++ and a decent knowledge of electronics which I think would be enough to start learning Arduino. Unfortunately, life got busy, so I never had the opportunity to delve deeper into my Arduino projects.

Fast forward to 2023, while cleaning and inspecting my belongings, I stumbled upon the Arduino and its accessories I purchased 13 years ago. It reminded me of my initial enthusiasm and curiosity about exploring its potential. When my children saw it, they were curious and asked what it was. I explained that it was a device I wanted to try out long ago, but life got busy, and I never had the chance to explore it fully. Now, seeing their interest, I’m considering giving it another shot and involving them in discovering its possibilities together.

Join me as I start to re-learn Arduino. I will document this learning journey for you to follow our progress. Feel free to reach out if you have any suggestions or questions, or need assistance.

Read more