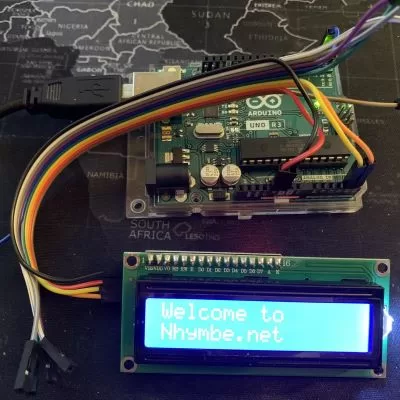
This project aims to display text using a 16 x 2 LCD Display. Having the ability to use an LCD display will surely come in handy for future projects where I will need to provide visuals.
Below are pictures showing you how to connect the LCD Display to the Arduino.

Connect the red cable to 5V and connect the black cable to Ground (GND). Connect the yellow cable to A4 and orange cable to A5.
On your LCD Display, connect red cable to 5V and black cable to Ground (GND). Connect yellow cable to SDA, which is A5 on Arduino and orange cable to SCL, which is A4 on Arduino.
Below is the sketch to upload to your Arduino.
#include <Wire.h>
#include <LiquidCrystal_I2C.h>

// set the LCD address to 0x27 for a 16 chars and 2 line display
LiquidCrystal_I2C lcd(0x27,16,2);

void setup()
{
  lcd.init();                      // initialize the lcd
  lcd.backlight();
}

void loop()
{
  lcd.setCursor(0,0);
  lcd.print("Welcome to ");
  lcd.setCursor(0,1);
  lcd.print("Nhymbe.net");
  delay(2000);
  lcd.clear();
  delay(1000);
}
Check the short video below on this work.
If you have any questions, feedback, or comments, feel free to leave me a message in the comment section below.
List of Material
References
Notes
Awesome!